Outlook has numerous features and functions that allow you to customize it for your use.
- You must control the Reading Pane for each of your mail folders individually
- The Reading Pane is turned on by default.
Turn off the Reading Pane
1. On the View tab, in the Layout group, click Reading Pane, then click Off
2. To turn on or reposition the Reading Pane – On the View tab, in the Layout group, click Reading Pane, then click Right or Bottom

Mark messages as read after previewing in the Reading Pane
- Click the File tab>Options>Advanced.
- Under Outlook panes, click Reading Pane
- To turn this feature on, select the check box at Mark items as read when viewed in the Reading Pane, and then enter a number in the Wait __ seconds before marking item as read
- To turn off this feature, clear the check box at Mark items as read when viewed in the Reading Pane.

Message Arrangement
Default arrangement to view messages is by date. A different arrangement can be used for each folder. Switch to other arrangements by doing either of the following:
- On the View tab, in the Arrangement group, in the gallery, click the arrangement you want.

- Click the appropriate column header at the top of the message list to sort messages

Signatures
- Select the File tab, then Options
- Select Mail from the left hand menu
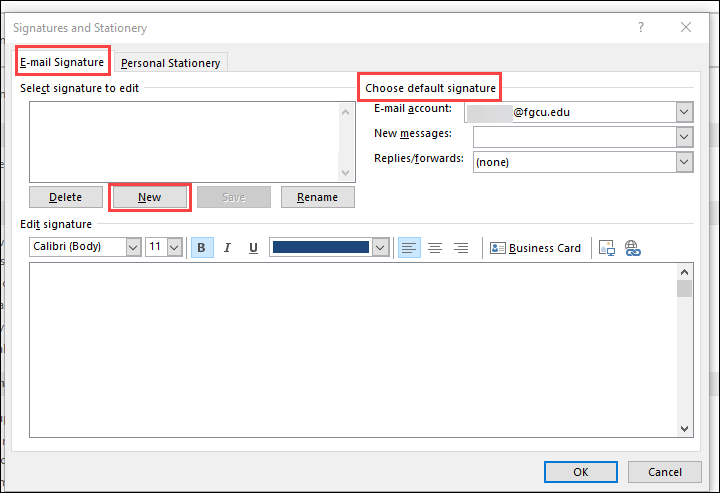
- Click the Signatures button
- In the Signatures and Stationery pop up box, Email Signature tab, select the New button
- Enter a name for the Signature and click OK
- Enter and format your Signature in the signature body text box
- Select Choose Default Signature options
- When complete click OK
Automatic Replies (Out of Office)
- Select File tab
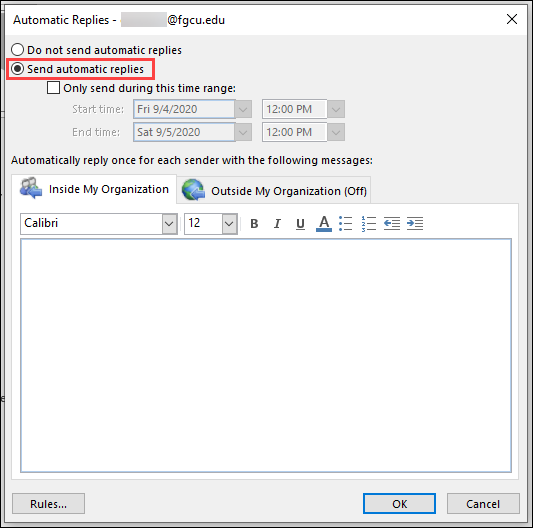
- Select Automatic Replies
- Select Send automatic replies
- Check the box next to Only send during this time range:
- Set the start and end time
- Enter your Auto Reply in the text box and format appropriately
- Select OK
Folders
Folders help organize messages and information in Outlook.
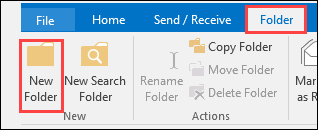
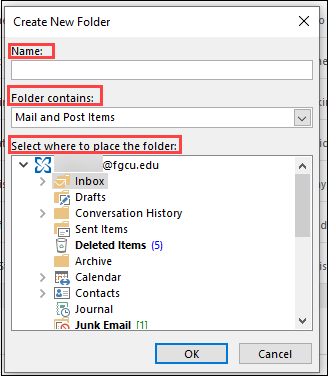
- Click the Folder tab and select New Folder.
- This will bring up Create New Folder dialog box; enter an appropriate name for the folder.
- Choose options in Folder Contains
- Choose where you want the folder to reside in Select where to place the folder.
- Click OK
Contacts and Groups
Create a new Contact:
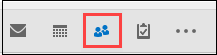
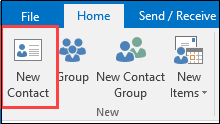
- Click the People icon at the bottom of the navigation pane, then select New Contac
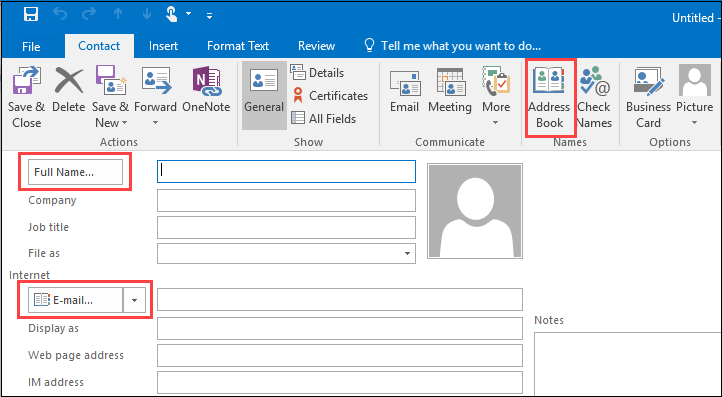
- Enter appropriate info or click Address Book in the Names group in the Ribbon
- Search for and select appropriate person from the Address Book
CAUTION: when searching Address Book, be sure you have selected the appropriate list from which to search. FGCU Faculty-Staff list is the most easily searched, using last name.
Create a new Group:
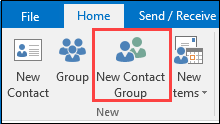
- Click People>New Contact Group
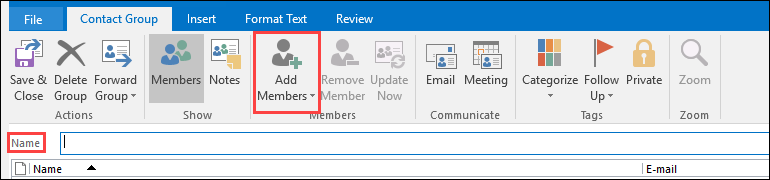
- Name your Group
- Click Add Members; select members from Contacts, Address Book or enter manually
- Click Save & Close
To send to a Contact Group when creating a new message, simply enter the Contact Group Name in the "To" field.
Add or Remove Members:
- Click People> double click Group name in your Contacts list
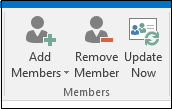
- Once the Group is open, select Add Members or Remove Members, or delete the Group entirely
- Click Save & Close to save your changes
Receipts
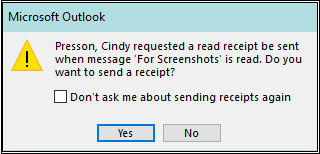
A Delivery Receipt confirms delivery of your email message to the recipient's mailbox, but not that the recipient has seen it or read it. A Read Receipt confirms that your message was opened.
Delivery or Read Receipt
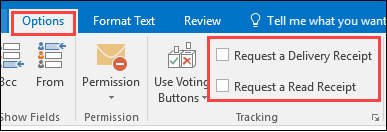
- In the message, on the Options tab, in the Tracking group, select the Request a Delivery Receipt or the Request a Read Receipt check box.
- Delivery and Read Receipts will appear in your Inbox

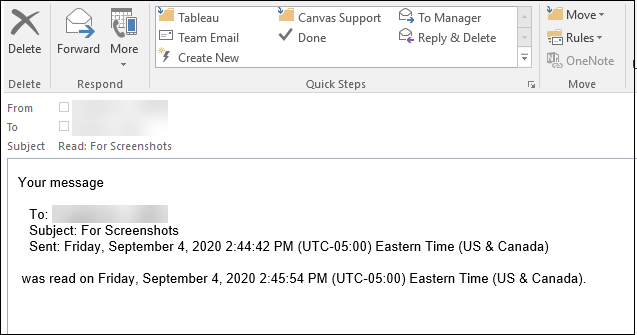
NOTE: Recipients have the option to deny sending a Read Receipt