Mail Merge is a useful Word tool that allows you to easily produce multiple letters, labels, envelopes, name tags and more using a Word document and information stored in a list, database or spreadsheet.
To start a mail merge, you need two things: a letter (or document) and data. Construct the letter, then add the data from Excel, Access, or other data source.
Main Document
- Create the Word document that you wish to use as your main document.
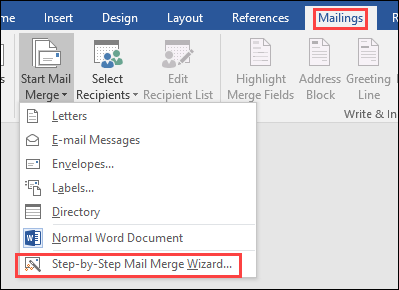
- On the Mailings tab, in the Start Mail Merge group, click the drop down menu for Start Mail Merge.
- Select Step by Step Mail Merge Wizard
- The Mail Merge task pane will open and guide you through the six main steps to complete a mail merge
NOTE: You may choose to select one of the other individual options from the menu and walk through the mail merge steps in that fashion; however, using the Wizard provides you with clear directions and the ability to easily return to a previous step in the process.
Using the Mail Merge Wizard
Step 1: Select the desired document type [Letters] > click Next: Starting Document

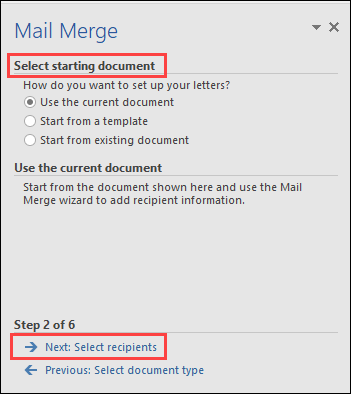
Step 2: Select Starting Document (choose document you have created for this purpose)> click Next: Select recipients
Note that the Wizard now provides the option to return to the previous step
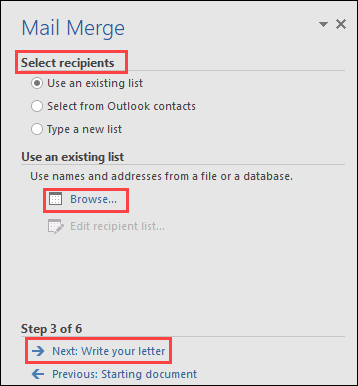
Step 3: Select Recipients > Use an existing list > Browse>Select data source and choose the appropriate data source from your local or shared files. Click Next: Write your letter
Step 4: At this step you will begin to insert items from your data source into your document. There are 2 options for formatting the Address section of your letter
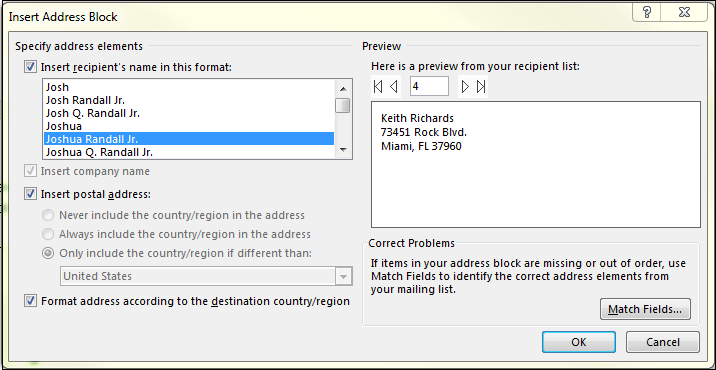
a.) Select “Address Block” in Wizard. Choose desired address format from the options presented; select other options as desired and click “OK.”
Note that “Address Block” is now inserted in document. This option should be used if the address section is not previously formatted.
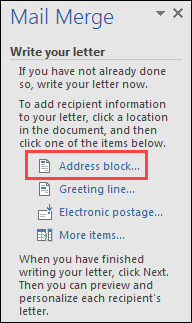
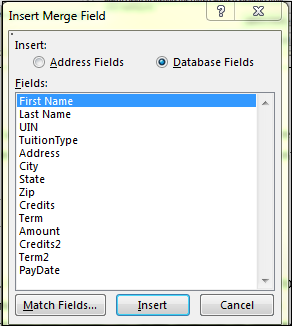
b.) Select “More Items”; this shows all data fields and allows you to insert fields exactly where needed in document. “Insert” and “Close” must be used for each field when inserting. When all fields have been entered, select Next: Preview your letters.
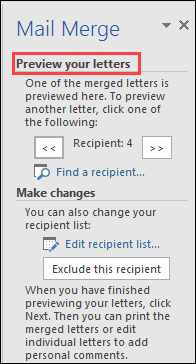
Step 5: Preview letter, noting any corrections needed. Changes made at this point will apply to ALL individual letters once the merge is completed. When corrections are made, select Next: Complete the merge
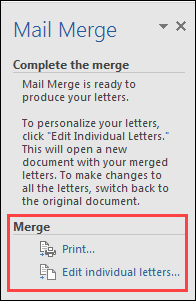
Step 6: Select “Print” if you are confident that your letters are ready, or “Edit individual letters” if you want to review each letter before printing all. NOTE: If your batch is relatively small, reviewing each individual letter is recommended, particularly to check zip codes beginning with "0" in the address section.