A Worksheet filled with data doesn't have to be boring! Here are some ways to manage your data and create some visual interest in the bargain.
Formatting Text & Numbers
Font and Font Size
- Select the cell(s) you want to format
- Select the Home tab
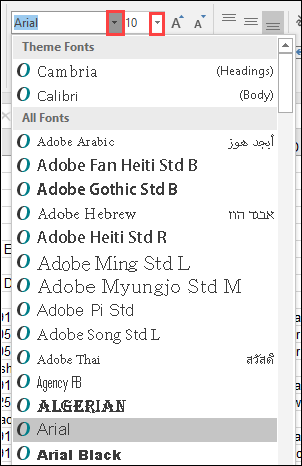
- Navigate to the Font group and change the font type or font size by clicking the dropdown arrow and selecting the desired option
Font Color and Emphasis
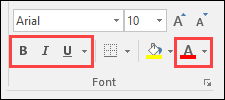
The Font group under the Home tab enables bolding, italicizing, underlining and setting the color of your font.
Wrap Text
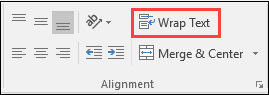
Wrapping text allows you to keep the contents within the boundaries of a specific cell.
- Select the cell, column or row you want to wrap
- Select the Home tab, Alignment group
- Click Wrap Text
NOTE: Row height or Column width may need to be adjusted to get the desired appearance
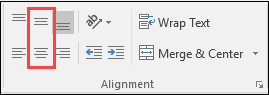
Center Text
- Select the cell in which you want to center the text
- Under the Home tab, in the Alignment group, select the Center icons for vertical and/or horizontal orientation
Indent Text
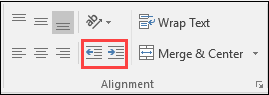
- Select the cell you want to indent
- Under the Home tab, in the Alignment group, select the Increase Indent button
- To reverse, select the Decrease Indent button
Clear Formatting
Formatting stays with the cell. Deleting or editing the cell does not delete the formatting, you must clear the formatting.
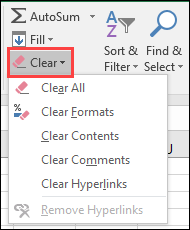
- Select cells to clear (or entire workbook)
- Under the Home tab in the Editing group, click the Clear dropdown arrow
- Select Clear Formats to remove cell formatting while leaving contents intact
- Clear All removes formatting AND contents of cell(s)
Format Painter
The Format Painter copies the formatting from selected portions of the Worksheet and applies it to other portions.
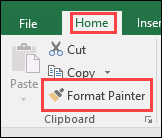
- Select the section of the Worksheet from which you wish to copy the Formatting
- Under the Home tab, in the Clipboard group, select the Format Painter button
- Select the portion of the Worksheet to which you wish to apply the Formatting; it will apply automatically
Conditional Formatting
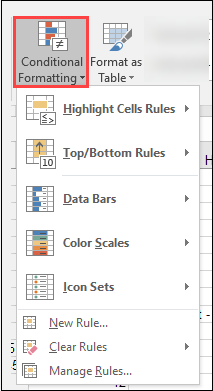
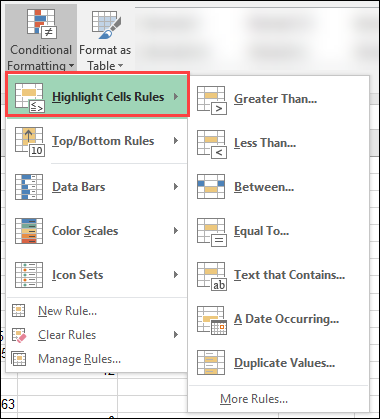
Conditional Formatting helps you visually answer specific questions about your data. You can apply Conditional Formatting to a range of cells.
- Highlight the Column or cell range to which you wish to apply Conditional Formatting
- Navigate to the Home tab, Styles group, and click the dropdown arrow for Conditional Formatting
- Expand the menu for the desired Formatting Rule and select appropriately, or create your own Formatting Rule by selecting New Rule
Merging Cells
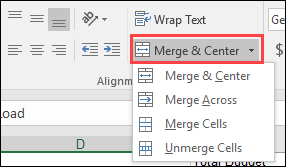
When you merge two or more adjacent, horizontal or vertical cells, the cells display across multiple columns or rows.
- Select the cells you wish to merge
- Under the Home tab, in the Alignment group, select the dropdown for Merge & Center
- Select the desired Merge option
NOTE: If you want to Merge and Center, simply click that option; no need for the menu.
Cell Styles
A Style is a set of formatting characteristics that you can apply to text, tables and lists in your document to quickly change their appearance.
Quick Styles
- Select the cells you want to format.
- Under the Home tab, in the Styles group, select a Style in the Styles box (use the navigation arrows to view all Styles)

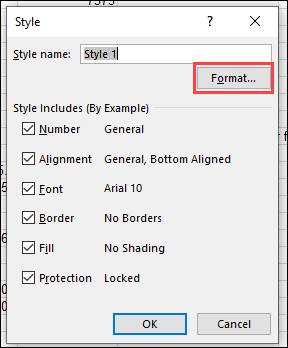
NOTE: To create your own Style, click the "all" dropdown arrow at the bottom right of the Styles box and select New Cell Style. Name your custom Style and click Format to set desired options. Your custom Style will appear as an option in the Styles.

Themes
A Theme can be applied to change the visual appearance of your worksheet. Themes combine Color, Fonts & Effects.
NOTE: A Theme will only apply to those cells/areas in which Styles have been used.
- Navigate to Page Layout tab
- Under the Themes group, select dropdown arrow under Themes button to display options
- Select desired Theme
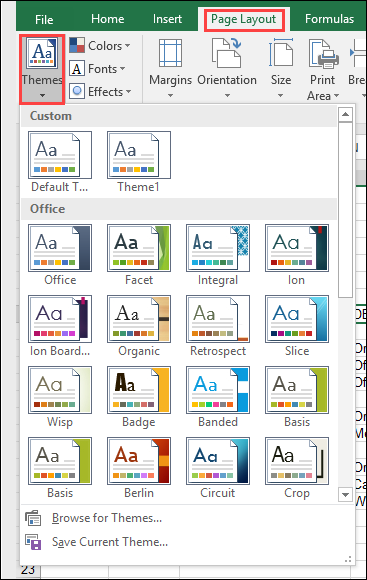
NOTE: To create a custom Theme, select the dropdown arrow for Colors, Fonts, and Effects individually, choose the "Customize" option and name your Theme. Your customized Theme will then appear as an option in the Themes list.
Splitting Columns
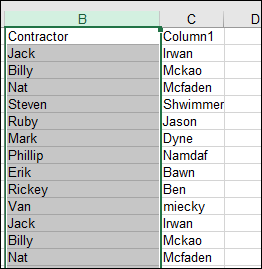
This function allows you to split data in one cell into two separate cells/columns. It's particularly helpful in separating things like first and last names, sections of an address, etc.
- Select the Column of data you'd like to split
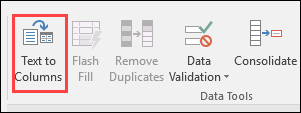
- Navigate to the Data tab, the Data Tools group and select Text to Columns
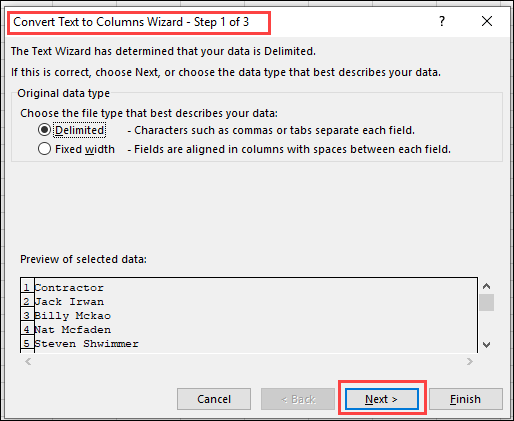
- Follow the steps in the Convert Text to Columns Wizard
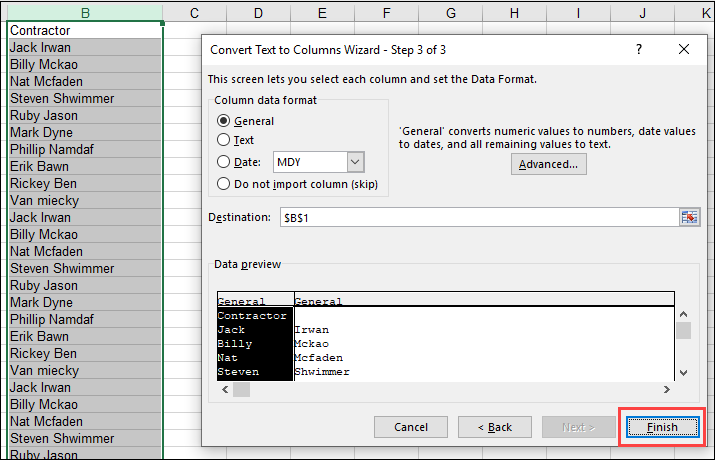
- When all options have been set, click Finish
- Initial Column will now be split into two Columns; adjust headings as necessary
Hide Rows & Columns
If your Worksheet contains data you may not wish others to see or that is not pertinent to the end result, you can hide it temporarily.
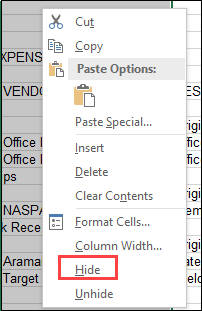
- Select the Column(s) or Row(s) you wish to Hide
- Right click and select Hide from the menu
- Hidden Columns/Rows are indicated by a white "bar", and the absence of the sequential Column letter or Row number

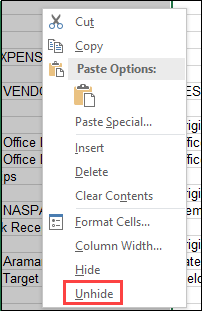
To reveal Columns or Rows, right click on "hidden" section (white bar) and select Unhide
Setting a Print Area
When preparing to print your Worksheet, you can define a Print Area that will print only that area.
- Highlight the desired Print Area on your Worksheet
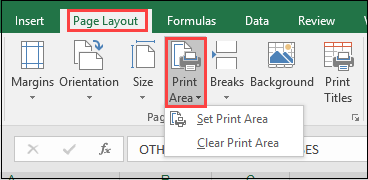
- Under the Page Layout tab, Page Setup group, click the Print Area button
- Select Set Print Area; section to be printed will be outlined with a thin border
To remove the Print Area, repeat the process and select Clear Print Area
Grouping Worksheets
Grouping Worksheets enables you to enter a single value into multiple Worksheets simultaneously. *NOTE: the Worksheets must be arranged in the same manner on each Worksheet.
- Select the first tab for the Worksheets you wish to group together
- Holding down the Ctrl key on your keyboard, select the tabs for the additional Worksheets to group; all tabs will appear "active"
- Enter or change data in the appropriate cell on ONE of the grouped Worksheets
- The data will automatically be entered in the same location on all grouped Worksheets
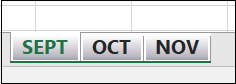
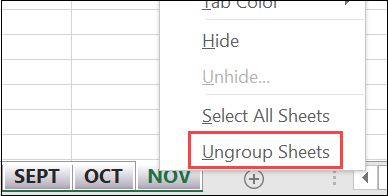
To ungroup the Worksheets, right click any tab and select Ungroup Sheets from the menu
*NOTE: Ungroup Worksheets prior to entering data that applies to an individual Worksheet