PowerPoint has numerous features and functions to really make your presentation "pop"!
Adding Audio
Add music (or other sound bites) during your presentation to make it more interesting.
Pre-recorded audio files:
- Select the slide to which you want to add sound/audio
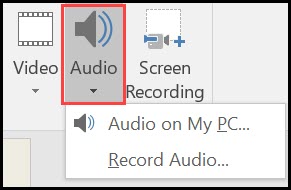
- Select the Insert tab; in the Media group, click the dropdown arrow under Audio.
- To add audio from your computer files or a shared drive, click Audio on my PC, locate the audio clip that you want, click the arrow beside the audio file, click Insert.
Audio Options
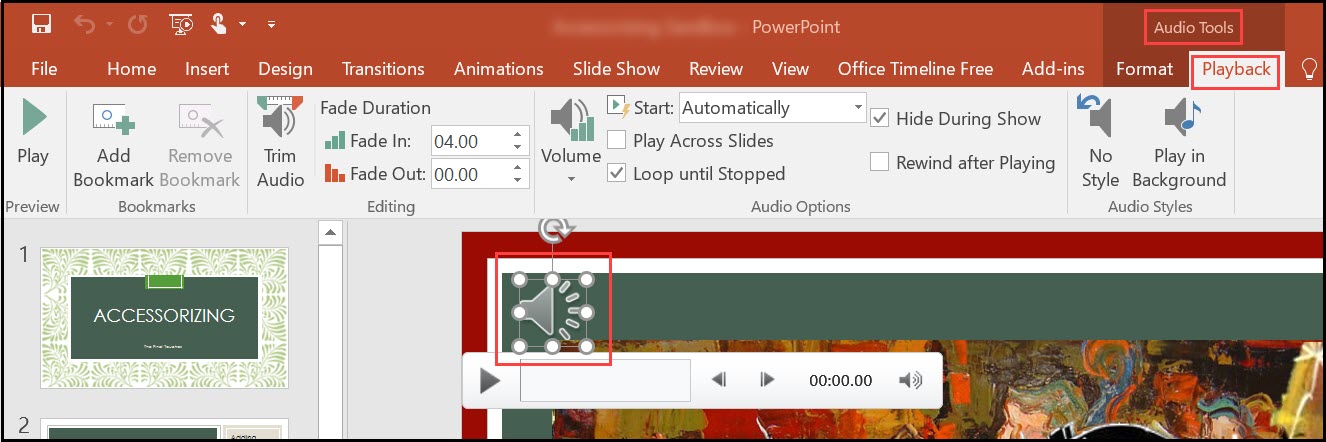
- On the Slide, select the speaker icon (representing the inserted audio file); the Audio Tools Contextual Tab will appear on the Ribbon
- In the Audio Tools Contextual Tab; select the Playback tab.
- Select the appropriate options here to Preview your audio, Edit your audio file, and set Audio Options
Record Audio
PowerPoint also enables insertion of a personally recorded audio file. You will need a device-integrated or USB microphone to utilize this function.
- Choose the slide in which you wish to add a recorded audio
- Under the Insert tab, in the Media group, select the Audio dropdown menu
- Click Record Audio
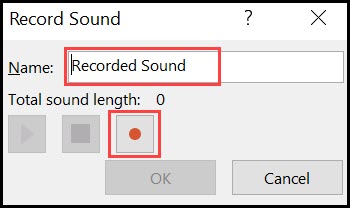
- Enter a Name for your Recording
- Click the Record button (red dot) to begin recording (timer will start counting seconds of recording)
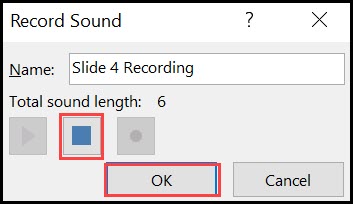
- When finished, press the Stop button (blue square)
- Click OK and your audio will be embedded in your Slide.
Use the Format and Playback options on the Audio Tools Contextual Tab to set preferences.
Screen Recording
PowerPoint enables insertion of a screen recording, including audio. To record and listen to audio associated with your screen recording, you'll need a sound card, microphone, and speakers. Ensure there's enough disk space on your local drive to record and save your screen recording.
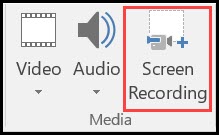
- Under the Insert tab in the Media group, select Screen Recording
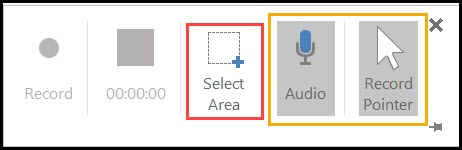
- A Recording Controls popup will appear; click Select Area to choose area of the screen to record (PowerPoint automatically records Audio and Pointer; deselect [click button] to turn off.)
- Drag cursor crosshairs to select section of screen to be recorded; recording area will be outlined with red perforated border; click Record button to begin recording
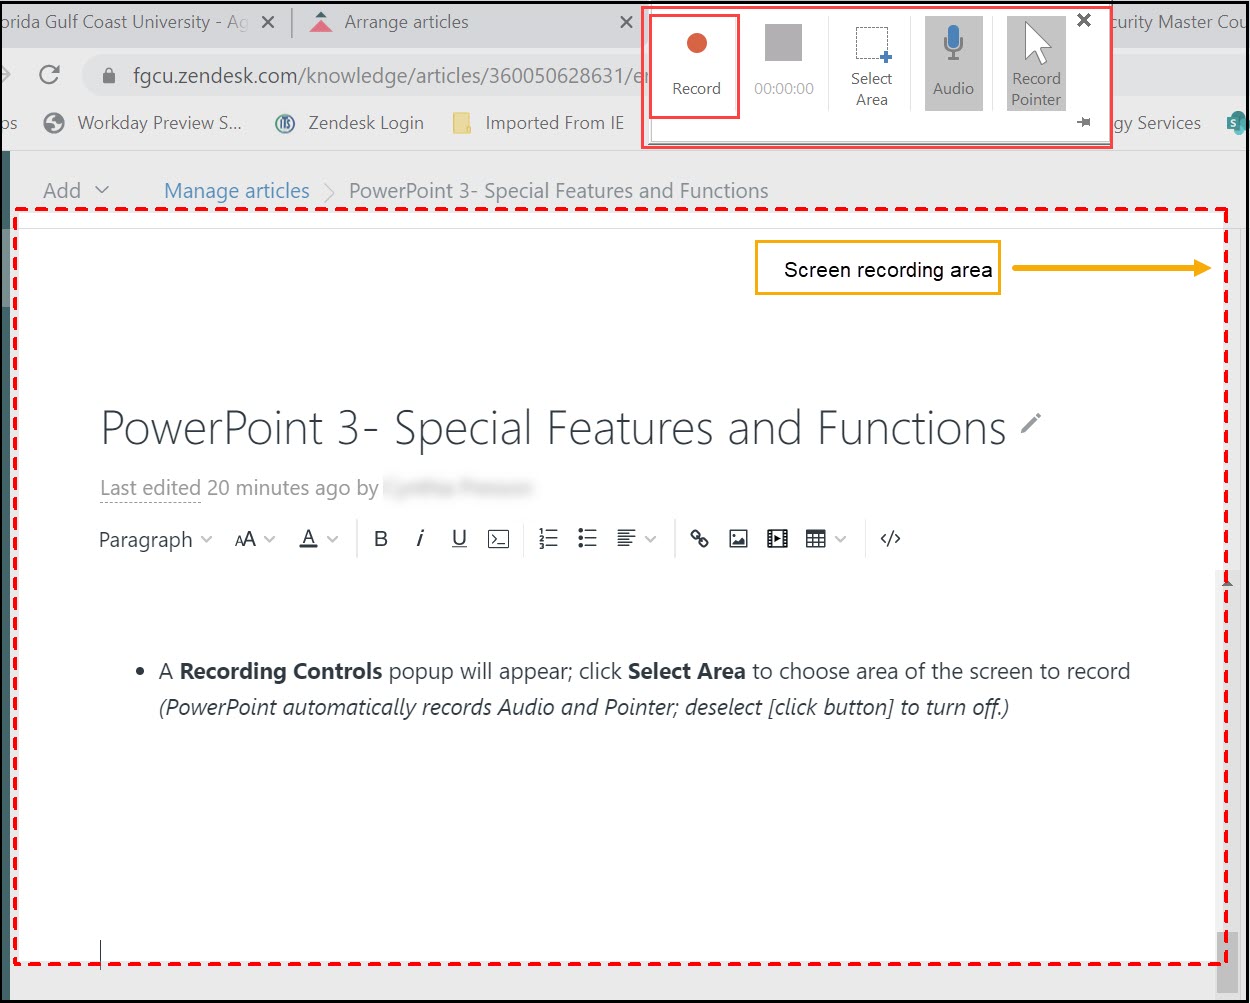
*NOTE: during recording, Recording Controls will disappear from the screen; place your cursor at the very top of your screen to make them reappear.
- When recording is complete, access Recording Controls and select the Stop button (blue square)
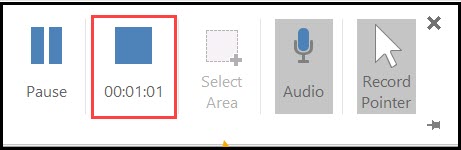
- PowerPoint automatically embeds the Screen Recording into the Slide with control bar
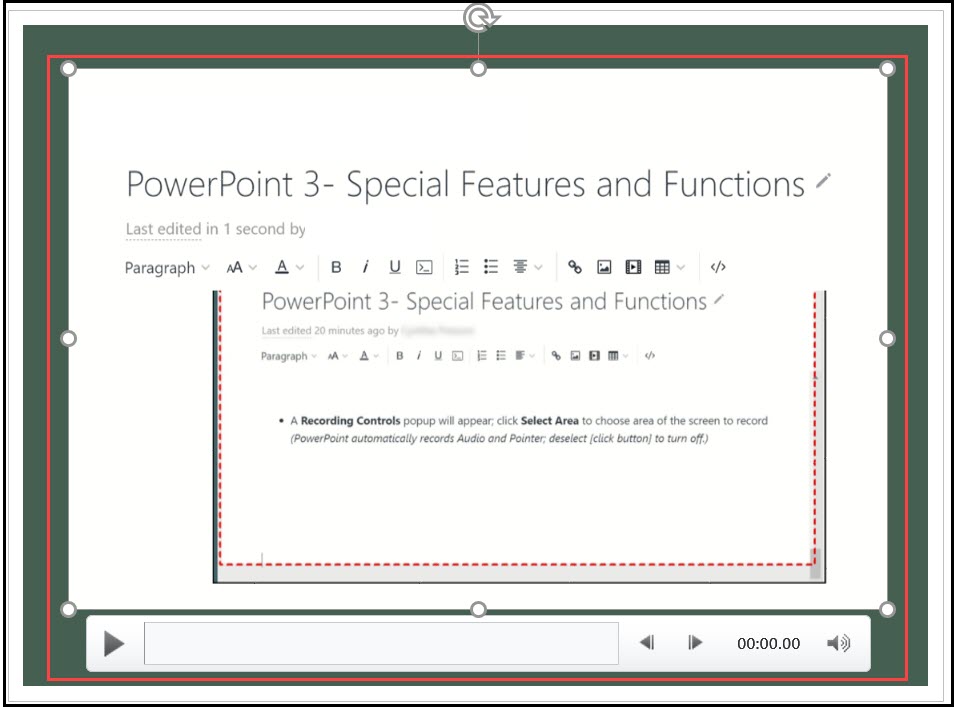
- Use the Video Tools Contextual Tab on the Ribbon to adjust your recording

Add-Ins
Numerous Add-ins are available for adding even more versatility to your PowerPoint. Add-ins may be saved to your local computer and installed by adding to the Available Add-ins list. If there is any doubt about the security of an add-in, please check with the University Help Desk before installing.
- Click the File tab
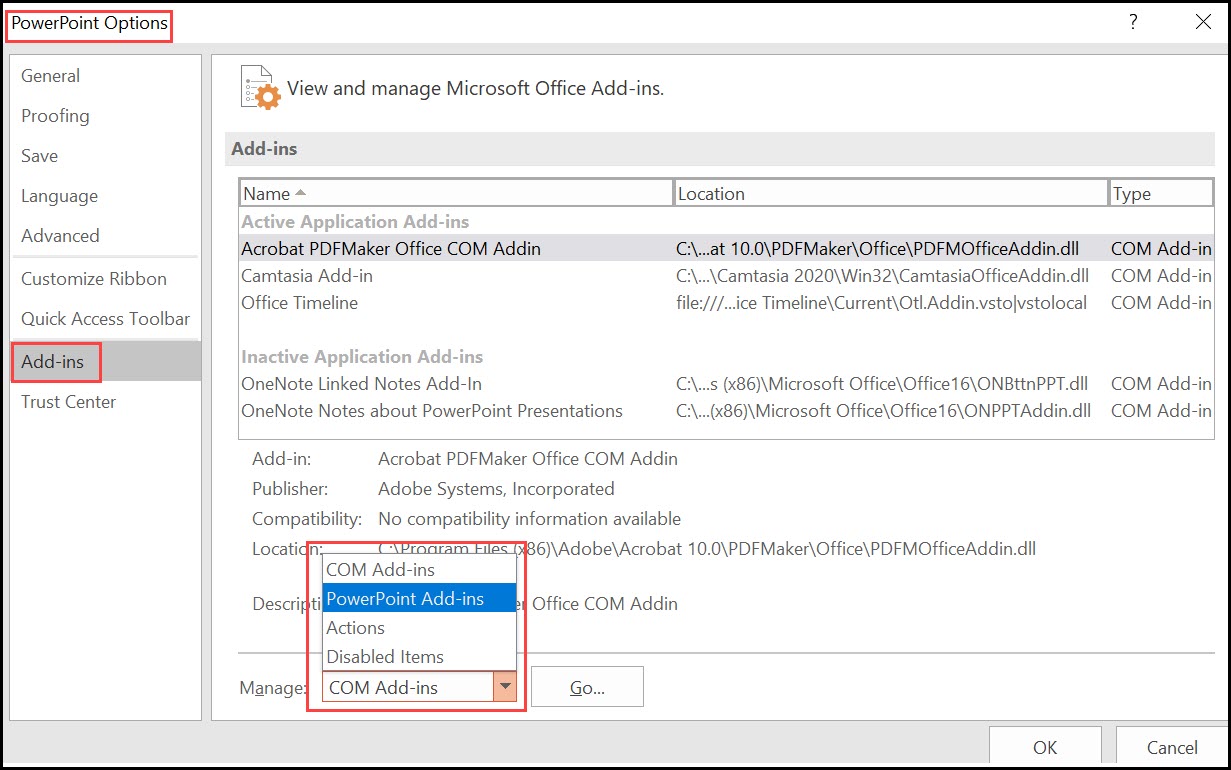
- Under Options, In the PowerPoint Options dialog box, click Add-Ins
- In the Manage list, click PowerPoint Add-ins, and then click Go.
- In the Add-Ins dialog box, click Add New.
- In the Add New PowerPoint Add-In dialog box, browse for the Add-in you want to add (in your local computer files), click OK
- A security notice appears. If you are sure that the Add-in comes from a trusted source (if unsure, please contact the Help Desk before proceeding) click Enable Macros, then click Close
- To open an Add-in in PowerPoint, select the Add-ins tab on the Ribbon