| << BACK TO GETTING STARTED WITH ONEDRIVE | SYNC FILES WITH ONEDRIVE IN WINDOWS |
SYNC FILES WITH ONEDRIVE FOR WEB |
What this article covers
When you install the OneDrive synchronization app for Mac, a copy of your OneDrive is downloaded to your Mac and put in the OneDrive folder. This folder is kept in sync with OneDrive. If you add, change, or delete a file or folder on the OneDrive website, the file or folder is added, changed, or deleted in your OneDrive folder and vice versa.
Note: If you are on an FGCU appointed computer using Mac OS, OneDrive can be located for installation via Self Service. If you are on a personal device, see below steps for more information.
Note: For information about syncing files on Mac OS, see Sync files with OneDrive in Windows.
To upload files to OneDrive automatically, just copy or move the files to your OneDrive folder using the Finder, or save them in your OneDrive folder from an app. Files you upload this way can be up to 100GB in size if you're signed in to a Microsoft account, or 15GB if you're signed in to a work or school account. If you installed the OneDrive app on other computers, the files will automatically be added to the OneDrive folders on them, too.
You can also use the Finder to rename and delete files, create new folders, and move files around in your OneDrive folder. The changes will automatically be made in OneDrive and your other computers that have the sync app installed.
The sync app lets you sync files from your OneDrive for Business and even from SharePoint sites if your admin enabled it.
Note: To use the sync app to sync your work files, you need an Office 365 business account.
Note: As of 1 February 2019, OneDrive only supports new installations on Mac OS 10.12 or newer. For more information, see OneDrive End Of Support Notice
Install and set up
If you have signed in to the OneDrive sync app with a Microsoft account (for example, someone@outlook.com), you should already have the sync app and you can skip to step 2 below.
-
Important: If you are currently using the OneDrive Mac Store app, you must first uninstall it before installing the latest build of the sync app.
-
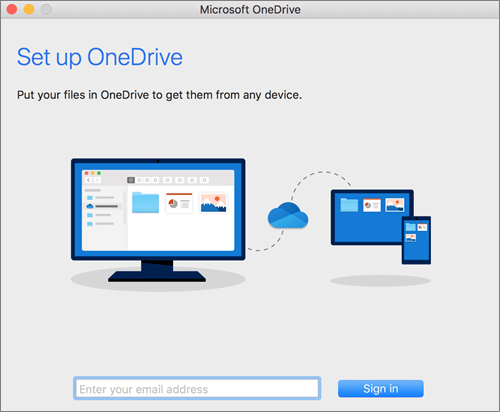
Start OneDrive Setup.
Method 1: If you have no accounts signed in to OneDrive
If you're not signed in to OneDrive with any account, start OneDrive to connect a work or school account.
-
Start OneDrive by pressing cmd+Space to launch a Spotlight query and type OneDrive. This starts OneDrive Setup.
-
Enter your work or school account and then select Sign in to set up your account.
Method 2: If you already have a personal account signed in to OneDrive
If you already have a personal account signed in to OneDrive, you’ll want to add a work or school account in OneDrive Preferences.
-
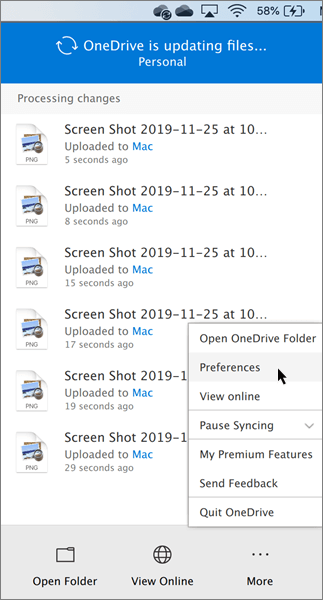
Click the OneDrive cloud icon up in your Menu bar, click the three dots to open the menu, and select Preferences.
-
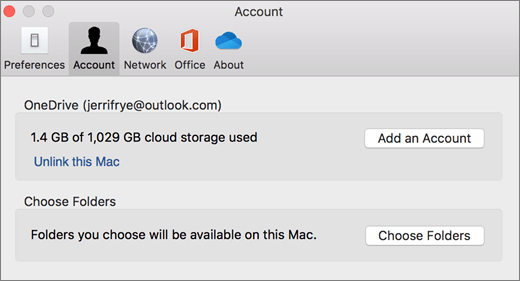
Click the Account tab, and then select Add an Account to start OneDrive Setup.
-
Enter your work or school account and click Sign in.
Key parts of OneDrive Setup
There are a few points of OneDrive Setup that are helpful to watch for:
-
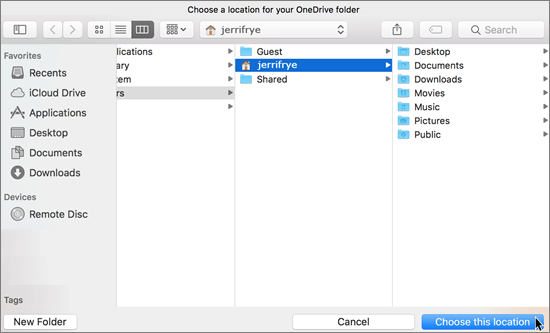
When setting up your OneDrive, it has a default location set. However, you can change this during setup. On the This is your OneDrive folder screen, click Change Location.
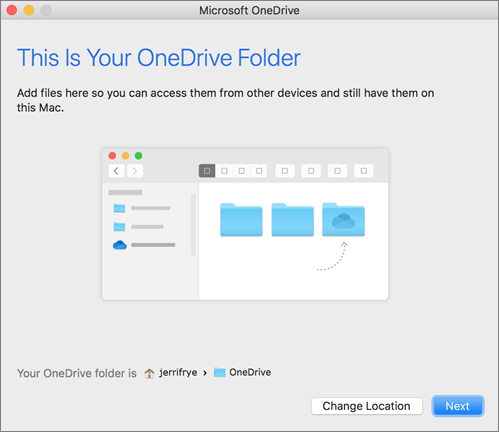
Select a location where you would like to save your OneDrive files and click Choose this location.
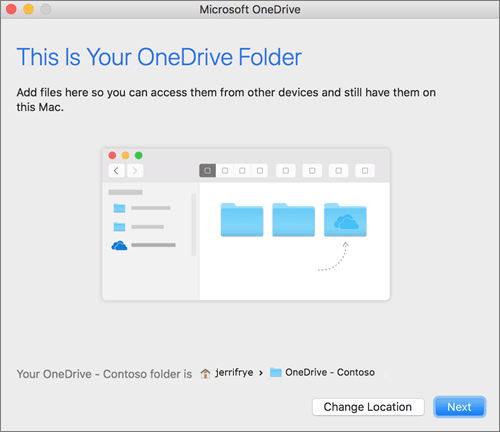
When you see the This is your OneDrive folder screen, you’ll now see a path to the folder you selected. Click Next to continue.
-
On the Sync Files from Your OneDrive screen, you can choose the folders you want to sync to your computer, and click Next. This conserves space on your computer, and reduces bandwidth needed for the sync processes.

-
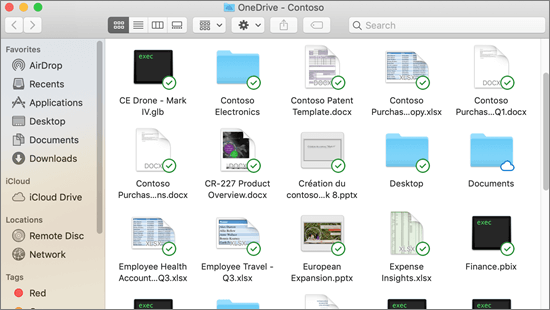
You’re done! Click Open my OneDrive folder to see your files sync to your folder.
You can find OneDrive up in your Menu bar. You’ll have a cloud icon for every account you’ve connected to OneDrive. So you’ll have one cloud if you’re only syncing a work or school account, one cloud if you’re syncing only a personal account, or two clouds if you’re syncing both.

Note: Contoso is an example name. You will instead see Florida Gulf Coast University.
Turn on Finder integration
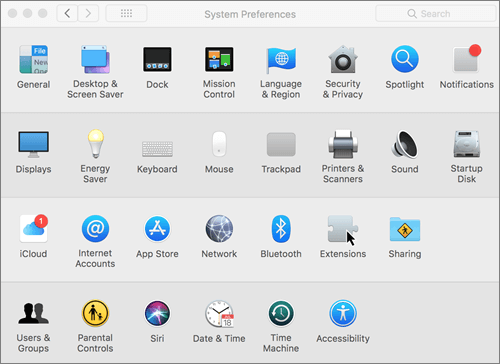
If you’re on OSX 10.10 or higher, get sync status directly from Finder by enabling Finder overlays in Settings.
First, click the Apple logo in the top left corner of your Mac Desktop and select System Preferences, then select Extensions in the top-level menu (shown in the 3rd row from the top).
Toggle on the OneDrive Finder Integration to enable Finder overlays.

You’re all set. Open up your OneDrive folder in Finder to see overlays on your files and folders.
If you're an admin on your device and want to enable sync icon overlays on multiple computers, you can use this Terminal command:
/usr/bin/pluginkit -e use -i com.microsoft.OneDrive-mac.FinderSyn
University Help Desk: ITS Knowledge Base | helpdesk@fgcu.edu |
239-590-1188
Monday-Friday from 7am to 10pm and Saturdays from 8am to 5pm